I've noticed that I've written many travel blogs here and wanted to balance that out with some of the things that happen here at home. After all, I don't spend all my time traveling, so what do I do here at home?
One of my newest, favorite projects is learning how to quilt a different type of quilt...landscape quilts and confetti quilts. My latest project was a confetti quilt and I decided to explain and show the process here. All of these are wall quilts, smallish projects-no more than 12" x 12".
A confetti quilt is made up of small pieces of fabric layered on top of a background, you basically "paint" the picture with the small pieces of fabric. This is a great project for those pieces of fabric that you had no idea what you were going to do with them. A rotary cutter is used to cut the fabric into tiny pieces. I put all the pieces of the same color into a ziplock sandwich bag and do the same for each color of fabric. You could cut the pieces into any shape you want. I find this can vary depending on what you're trying to do. If grassy places are needed maybe I'll cut the fabric into skinny, pointed rectangles. For small detail work, I'll make the pieces smaller. If a chunky look is needed, I'll make the pieces bigger. Anyway, it's a great way to use up pieces of fabric and get some energy out as I tend to be quick about cutting them up. Gather all the colors you think you need for your quilt and cut them up, separating them into bags.
There is a background that needs to be decided. Sometimes the background is still visible-as it is on the project I'm going to show you. Sometimes it's hardly visible-as I'll show you on some other finished projects. And because it's a quilt, you do need a backing and something for the batting. I wouldn't spend extra money on these things. For the project I'm showing you I used some white cloth I had laying around for the backing, the batting was part of an old flannel shirt, and the background was left over from my living room curtains that I had to shorten. I use a fabric adhesive to join the back, batting and background together. The type I use doesn't clog my needle on the sewing machine.
After arranging the confetti pieces of fabric on the background, the next step is to put the tulle on top of the picture. I've used different colors of tulle. For this project, since there was so much snow I used a whitish tulle. But I have used a dark color on the others I will show you. If you get up close to the wall hanging you can notice the tulle, but it doesn't stand out. Anyway you have to keep all those tiny pieces of fabric in place somehow and this seems to do it. I spray one side of the tulle with the adhesive and gently lay it on top of my picture-sometimes this takes two people. Make sure the tulle is as big as the background so that it can hold all the edge pieces in place. Once the tulle is on top I start free motion quilting. And I don't use any pins or needles to hold my fabric in place, the tulle does the job for me-the project is small and easy to move around my Juki sewing machine. You do have to have a bit of experience with free motion quilting. But this project is very forgiving and you can make "happy little mistakes" and it turns out just fine-the mistakes can be make with the "painting" part, or the sewing part. For the sewing part you do need to make sure the fabric and tulle stays flat and doesn't bunch up. If you've never free motion quilted I would advise practicing on some fabric sandwiches before starting. I've used different colors of thread for the quilting part depending on the quilt. This one with the snow I decided to use a monofilament thread-clear. The scene seemed to be a peaceful one and using different colors of thread didn't seem to appropriate, a clear thread all the way thru kept it simple and peaceful. I'll include pictures of wall quilts that have different colors of thread, some of them are variegated threads.
After quilting, the usual trimming, putting another backing on the back to hide the stitches, figure out to hang it on the wall and put the binding on and it's done!
So here's the pictures-sorry there's so many.
 |
Here the tree is just one color and I didn't like the shape of the mountains so...
|
 |
I added some different color greens to the tree and I changed up the mountains some.
|
 |
I changed the mountains some more and added snow to the boughs-I did have to precisely place the snow on the tree
|
 |
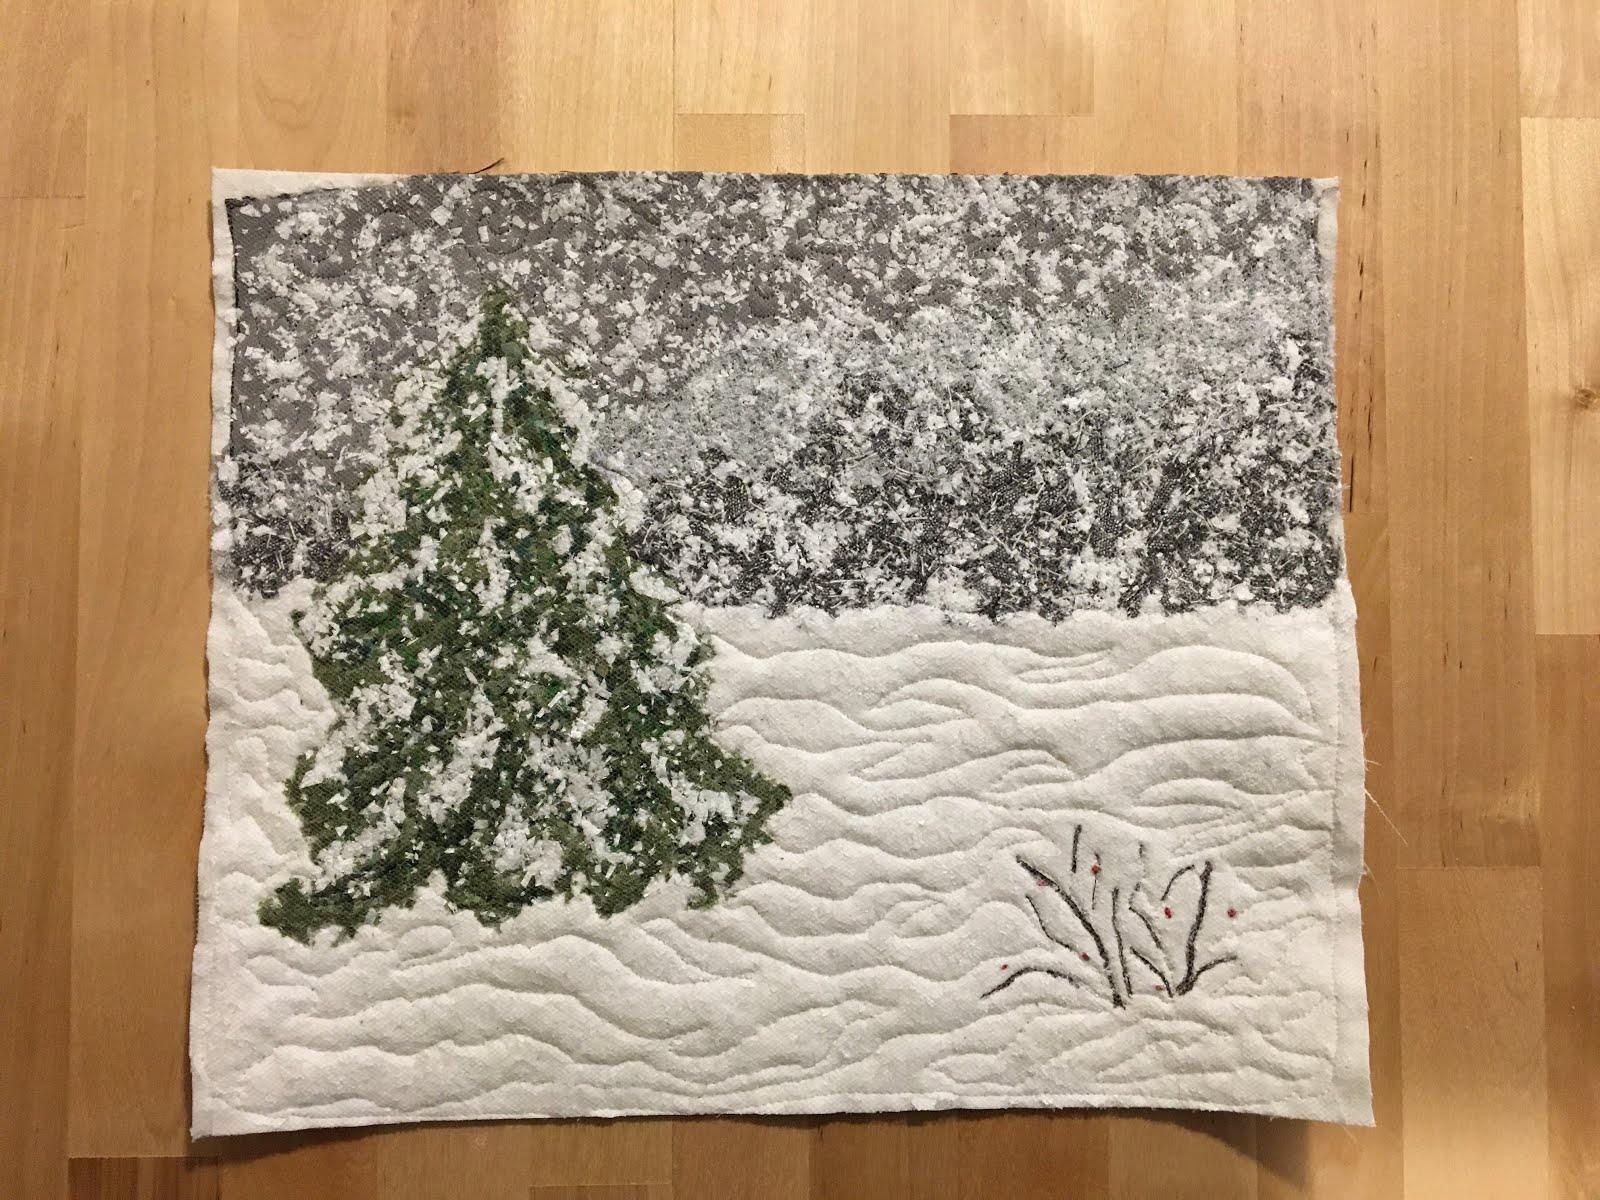
| I added the stick bush, I waxed the embrodiery thread to make it stiff, rolled the red thread into berries |
 |
| I sprinkled the snow over it all |
 |
| All quilted and trimmed, if you can enlarge it you can see the different types of stitches |
 |
| Here is the back after I quilted it, you can see the different types of stitches |
 |
Now the back has been covered, hangers sewn on and binding done
|
 |
| All finished |
 |
| This one has variegated threads, binding and back still needs to be done. Dani did the design and I did the sewing. |
 |
Here's the back, you can see all the different types of stitches
|
 |
| Finished project-it now hangs at my daughter, Dani's house |
 |
| This was the first one I did. The tree trucks in this one and the previous one are larger pieces of fabric. Adding the tree truck lines helps to give it some texture. |
 |
| This was the first landscape quilt I did-yes that's a real sand dollar. |
 |
| Another landscape quilt. I was experimenting- the cloud is gauze, the fence is twigs from my yard. The binding is just a zigzag rough finish. |
I have a few more ideas for other wall quilts. In time I'll update you all on them. In the meantime, it's off to write about other projects that go on around here at home.